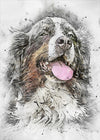
Dogs, with their diverse breeds and expressive faces, have always been a favored subject in art, capturing the hearts of both artists and viewers alike.
Whether it's the loyal gaze of a Labrador or the playful stance of a Beagle, each dog brings a unique character to the canvas. This guide is designed to help you, whether you're just starting out or you're an intermediate artist, to master the art of drawing dogs.
By breaking down the process into manageable steps and exploring various techniques, this guide aims to enhance your ability to depict these beloved animals with accuracy and expression.
What Is the Basic Dog Anatomy?
Drawing a realistic dog starts with a solid understanding of canine anatomy. This doesn't mean you need a veterinarian's knowledge, but a basic grasp of the dog's skeletal and muscular structure will greatly improve your drawings.
Here’s how you can get started:
Basic Structure
Start by learning about the key components of a dog's anatomy.
The skull varies in size and shape across different breeds. The spine gently curves downwards towards the tail, an extension of the spine itself. The ribcage acts as the main support for the body’s framework and is sizable compared to the rest of the body. The limbs, how they attach to the body, and their proportion to each other are essential elements to observe.
Breed Differences
The unique characteristics of each breed greatly influence their overall anatomy!
For example, a Greyhound exhibits a streamlined structure with a deep chest and slender limbs, contrasting sharply with a Bulldog’s broader, shorter skull and stockier build. Understanding these differences is essential when drawing specific breeds or aiming for realism.
Using References
Observing live dogs can provide invaluable insights into movement and natural poses. When live models aren’t available, photographs are excellent references. Focus on the posture and the way muscles move under the skin. Also, note the variations in fur, which can alter the perceived shape of body parts.
What Are the Materials Needed?
To begin drawing your favorite furry friends, having the right materials is key. So, let’s walk through various tools that can enhance your drawing!
Drawing Tools
The choice of drawing tools can vary based on personal preference and the style you want to achieve.
Here are some of the most commonly used tools:
- Pencils: A range of graphite pencils from hard (H) to soft (B) is invaluable for fine lines and shading. Hard pencils work well for detailed, light sketches, while softer pencils are great for dark, rich shadows.
- Pens: Ink pens like these Headspace x Poketo Pens can be used for definitive, bold outlines or intricate details. They are perfect for adding a sense of permanence and precision to your drawings.
- Charcoal: Ideal for expressive and moody pieces, charcoal allows for dramatic, rich textures and deep shadows.
- Markers: These can be used for adding vibrant colors or doing quick sketches with bold, clean lines.
Paper Types
The quality and texture of the paper can greatly affect the outcome of your drawings. An A5 Notebook is a good starting point — it allows you to check all the boxes for what you need.
- Smooth Paper: Best for detailed work with pencils or ink. It allows for sharp lines and fine detail.
- Textured Paper: Ideal for charcoal or pastel use, the texture helps to grip the medium for richer color and depth.
- Heavyweight Paper: It’s necessary for marker drawings to prevent bleeding and provide a sturdy base for heavier applications.
- Digital Tablets: For those who prefer digital media, a good graphic tablet can mimic the effects of physical drawing tools while offering undo options and easy corrections.
Having a variety of these materials at your disposal will allow you to experiment with different styles and techniques to see what best suits your vision.
What Are the Basic Sketching Techniques?
Starting with a solid sketch is fundamental in drawing. Here's a step-by-step approach to help you create the basic structure of a dog:
1. Start With Simple Shapes
Begin by sketching simple geometric shapes to form the basic outline of the dog. Use circles and ovals to represent the head, body, and parts of the limbs. A rectangle can serve as the torso's base.
2. Establish Proportions
Ensure that the proportions are correct relative to the size and breed of the dog. For example, a Dachshund will have a longer body and shorter legs, whereas a Boxer will appear more muscular with a square head.
3. Refine the Outline
Once the basic shapes are in place, start refining them into the more specific contours of the dog’s body. Smooth out the transitions between shapes and begin to define the legs, paws, and tail.
4. Add Guidelines
Lightly draw lines to indicate the direction of the dog’s fur, the alignment of the eyes, and the position of the nose and mouth. These will guide you when adding details later on.
These steps will create the foundation for your dog drawing. From here, you can start adding details, textures, and, eventually, color to bring your sketch to life.
What About Adding Details and Textures?
Once you have a basic sketch of the dog, the next step is to enrich it with details and textures that bring the drawing to life. This involves focusing on two key aspects: The fur and the facial features.
The type and texture of a dog's fur can significantly affect the appearance of your drawing. Here are techniques for effectively rendering different types of fur:
Short Fur
Use fine, short strokes with a pencil or fine pen to create the look of short fur. Follow the direction in which the fur naturally grows, which typically flows from the head down the back and towards the tail. Pay attention to areas of shadow and highlight to give the fur depth and realism.
Long Fur
Long fur requires longer, flowing strokes. Layer these strokes to create volume and texture. Consider using a combination of soft pencils to build up the density of the fur, and remember to leave some areas lighter to represent shine and highlights.
Curly Fur
Curly fur can be challenging but is effectively rendered by drawing spirals and curls tightly packed together. Use a varied touch, pressing harder in the depths of the curls to add shadow and lightly on the edges to suggest the fur’s bounce and lightness.
How To Draw Facial Features
The expression of a dog is captured primarily through its eyes, ears, nose, and mouth. Each feature requires attention to detail:
Eyes
Start with the shape, which can range from round to almond-shaped, depending on the breed. Eyes are expressive, so be mindful of the dog’s gaze and eyelid positioning. Add a small gleam or highlight within the pupil to give the eyes life and depth.
Nose
Most dog noses are textured and slightly moist-looking. Use stippling (small dots) or small textured strokes to replicate this. Ensure that the nose is appropriately sized and positioned symmetrically on the face.
Ears
Ears can vary widely from breed to breed. Whether floppy or erect, sketch the basic outline and then add lines to suggest the folds and creases of the ear. Adjust the thickness and direction of your strokes to convey the texture of fur on the ears.
Mouth
The mouth can indicate a lot about a dog's mood. A slight upward curve can suggest a smile, while a relaxed open mouth might indicate a panting dog. Use soft lines for the lips and darker shades inside the mouth to show depth.
You can achieve a realistic and expressive portrayal of a dog by carefully drawing the fur and facial features. This attention to detail will make your artwork stand out and truly capture the essence of your canine subject!
Bringing Your Canine Creations to Life
Drawing is both an art and a journey. Each dog you draw brings with it a unique opportunity to explore different shapes, textures, and expressions.
Don’t hesitate to step outside your comfort zone — try digital art if you've been working with traditional mediums or vice versa. Most importantly, enjoy the process of bringing these joyful creatures to life on your canvas! Your passion and love for the subject will shine through in your artwork, making each piece uniquely yours.
Keep practicing, use Poketo’s awesome supplies to guide you, and don't forget to share your work for feedback and inspiration. Happy drawing!
Sources:
Dog Breeds | American Kennel Club
4 Tips for Drawing Animals Accurately | Hunakai Studio
How Drawing is Like Kung Fu | The Drawing Website
10 Essential Drawing Materials and Tools for Beginners | The Virtual Instructor


